SSO with Google Workspace
Introduction
This KB article takes you through the steps required to integrate Google Workspace with BMS with SSO process.
Prerequisite
You should have an active Google Workspace admin account (https://admin.google.com/?pli=1).
Setting up Google Workspace
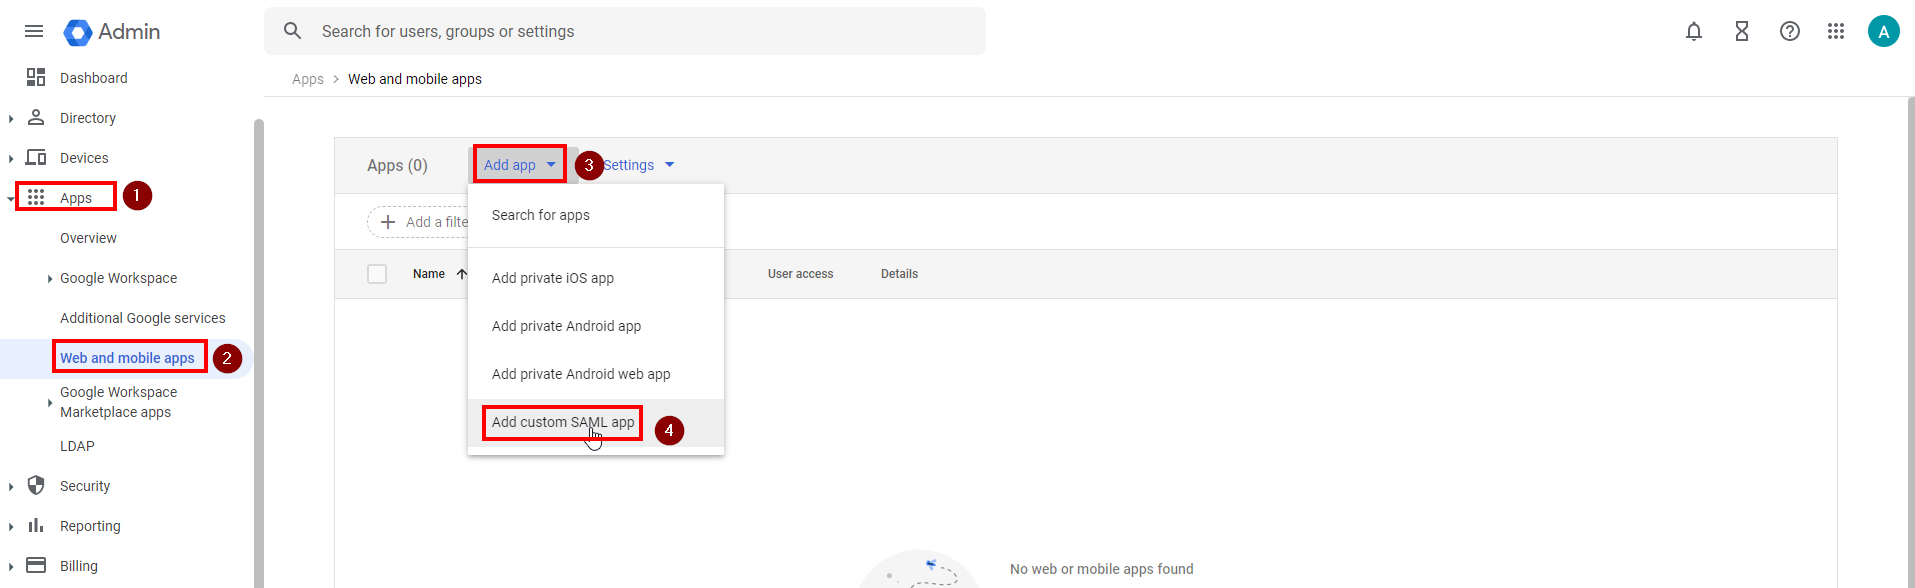
- Login and navigate to the admin dashboard.
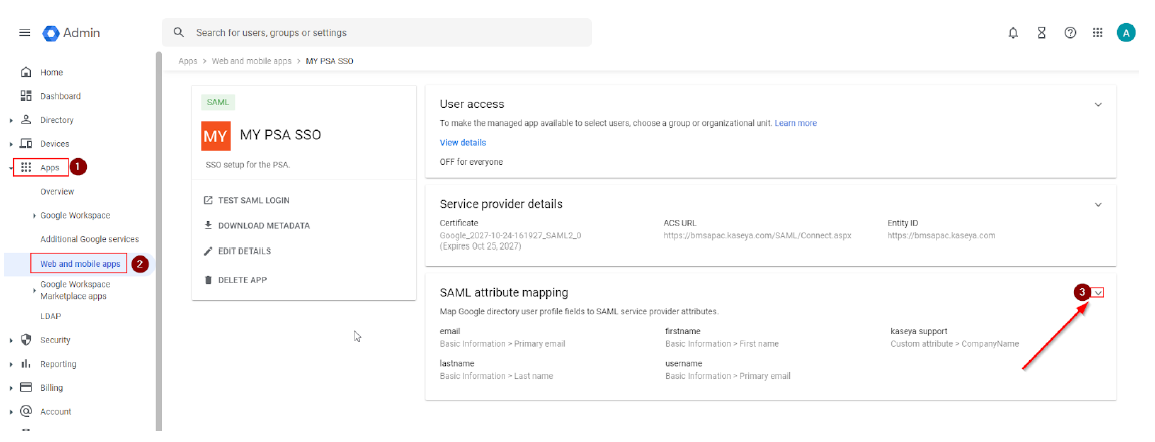
- Once you navigate to the admin dashboard, go to Apps > Web and mobile apps > Add App > Add custom SAML app.
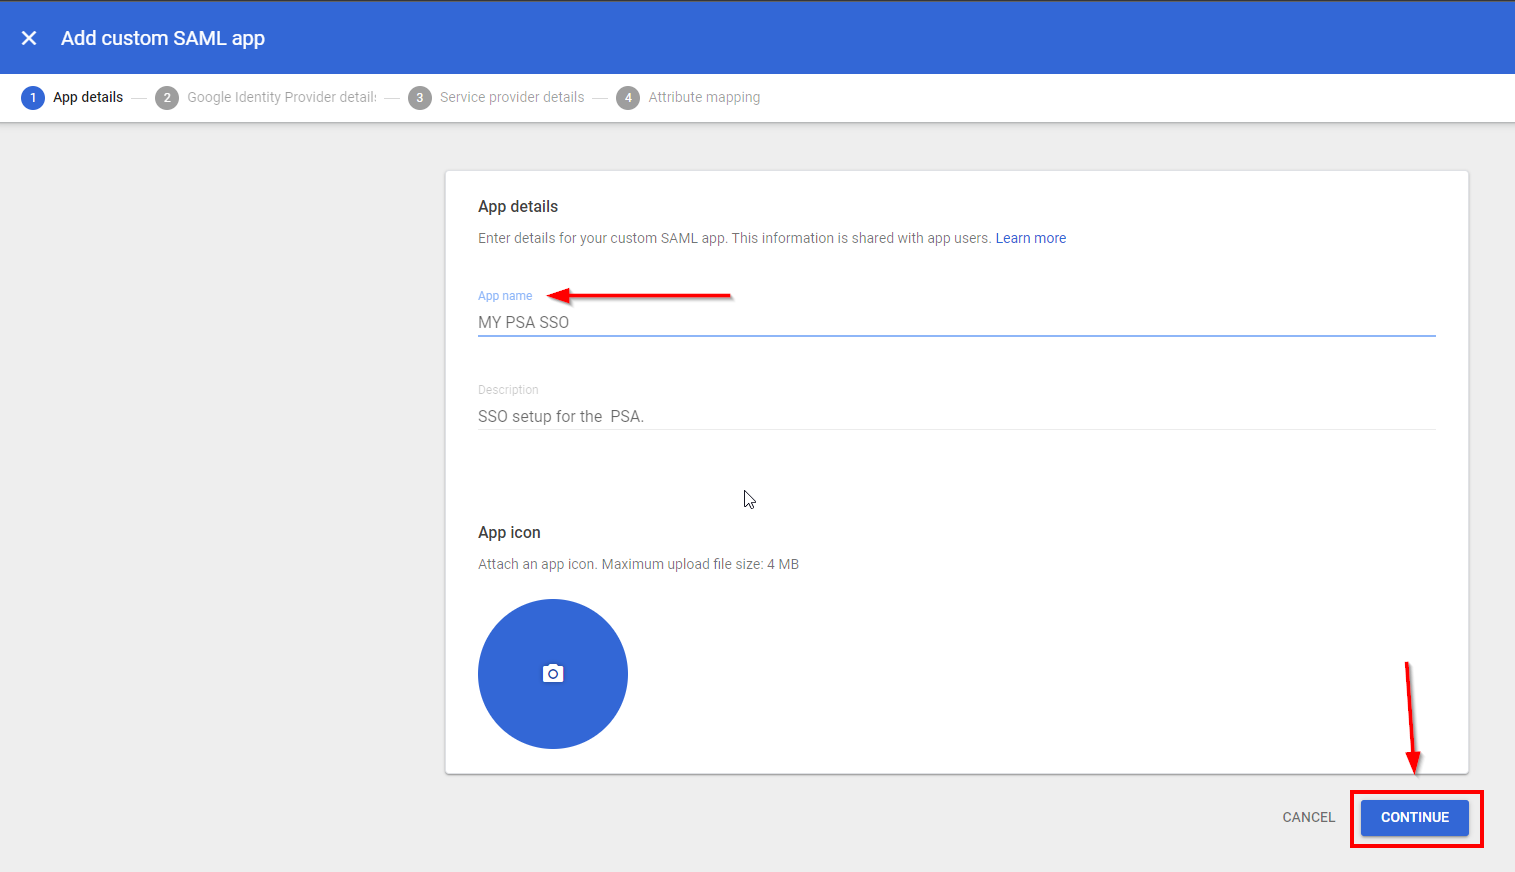
App details
- Fill in the app name, description and attach an app icon.
- Click Continue.
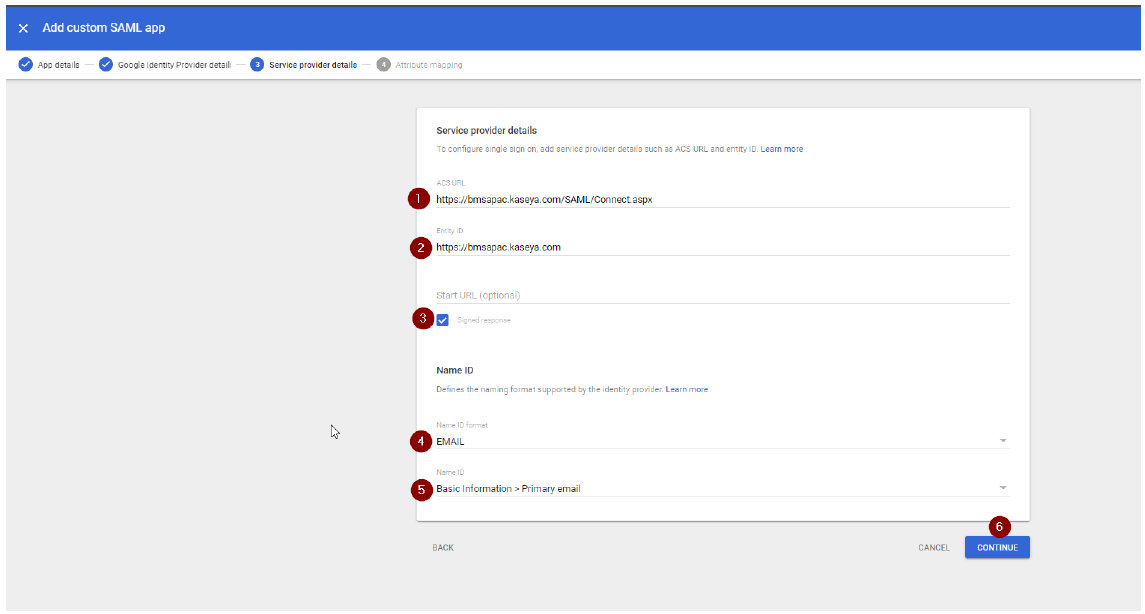
Google identity provider details
- ACS URL: Enter the ACS URL. The ACS URL should be in the format https://<your PSA server URL>/SAML/Connect.aspx.
- Entity ID: Enter your PSA server URL in the format https://<BMS server name>.com.
- Select the Signed response checkbox.
- Name ID format: Select Email.
- Name ID: Select Basic information > Primary email.
- Click Continue.
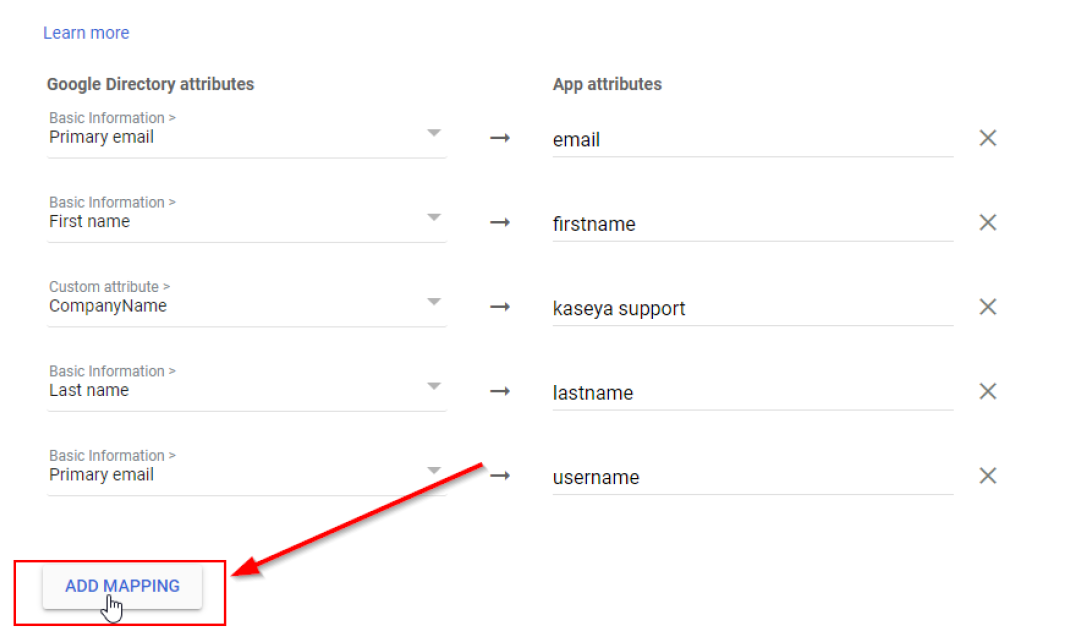
Attribute mapping
Below are the attributes used in Google Workspace.
| Google Directory Attributes | App Attributes |
|---|---|
| Primary email | |
| First name | firstname |
| Last name | lastname |
| Primary email | username |
| CompanyName | kaseya support |

Please note that CompanyName is a custom attribute.
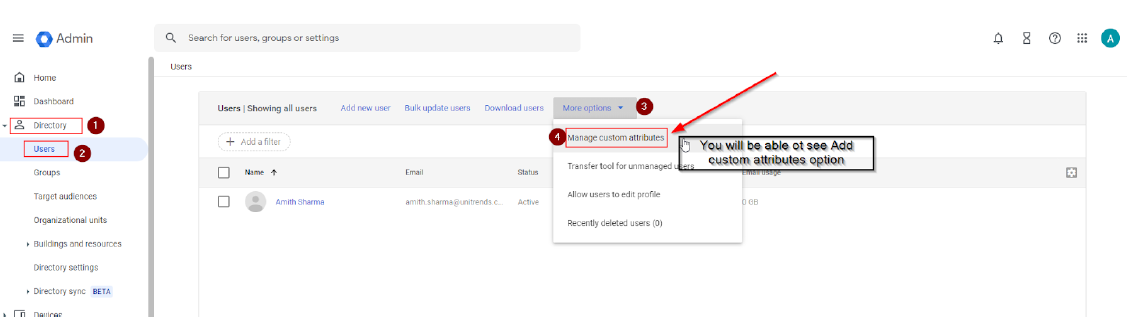
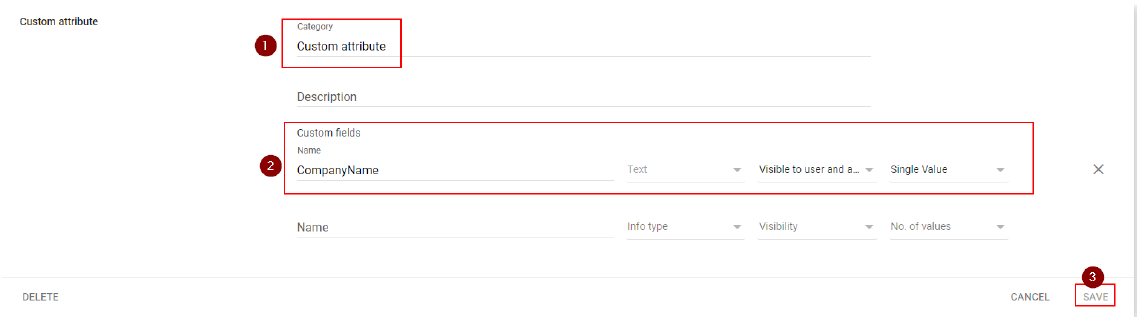
How to create a custom attribute
- Navigate to Directory > user > More options > Add custom attributes.
- From the Category dropdown, select Custom attribute.
- In the Custom Fields field, enter CompanyName.
- From the Info Type dropdown, select Text.
- From the Visibility dropdown, select Visibility to user and admin.
- From the No. of Values dropdown, select Single Value.
- Click Save.
Custom attribute and its application
In the custom app
The custom attribute will be used in two places.
- Navigate to Apps and click SAML attributes mapping.
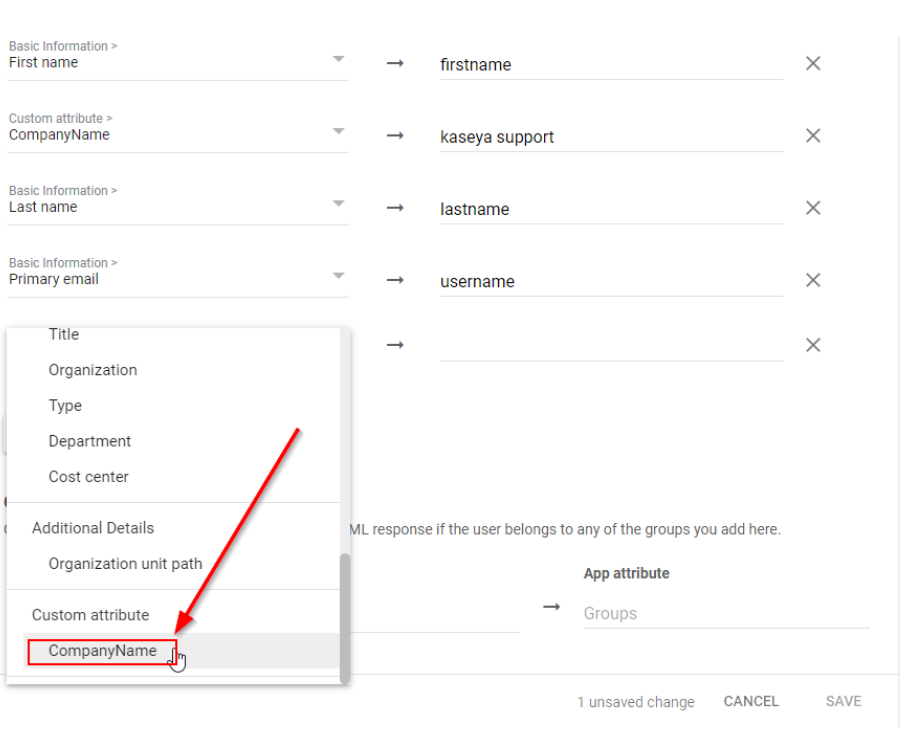
- Click Add mapping.
- Click Select field.
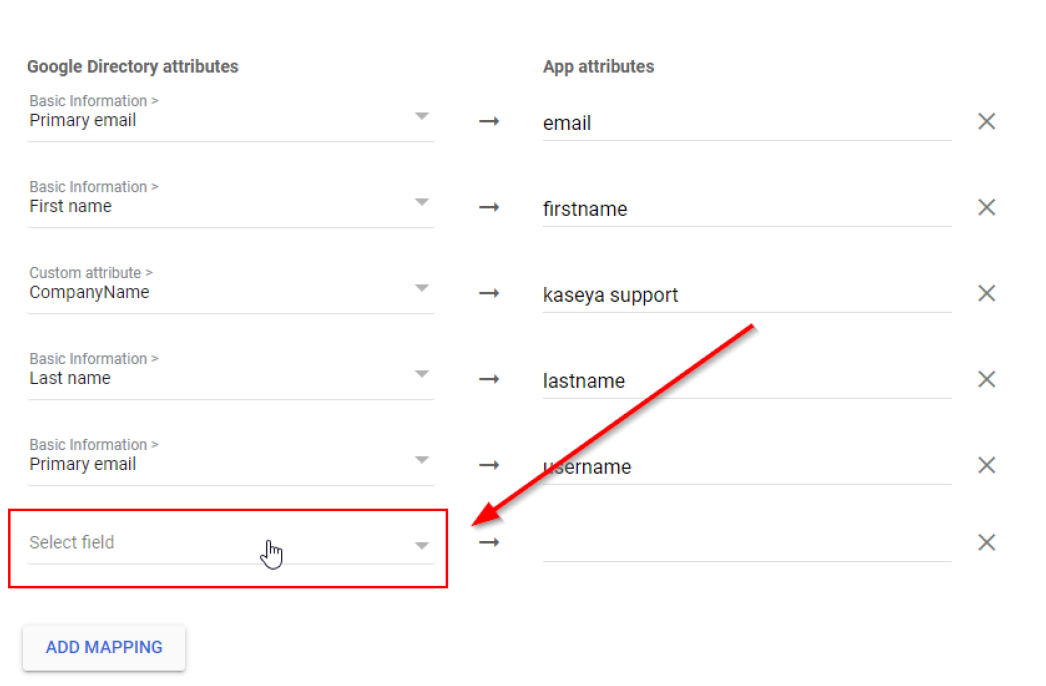
- Move your cursor to the extreme bottom and select the custom attribute which you have created.
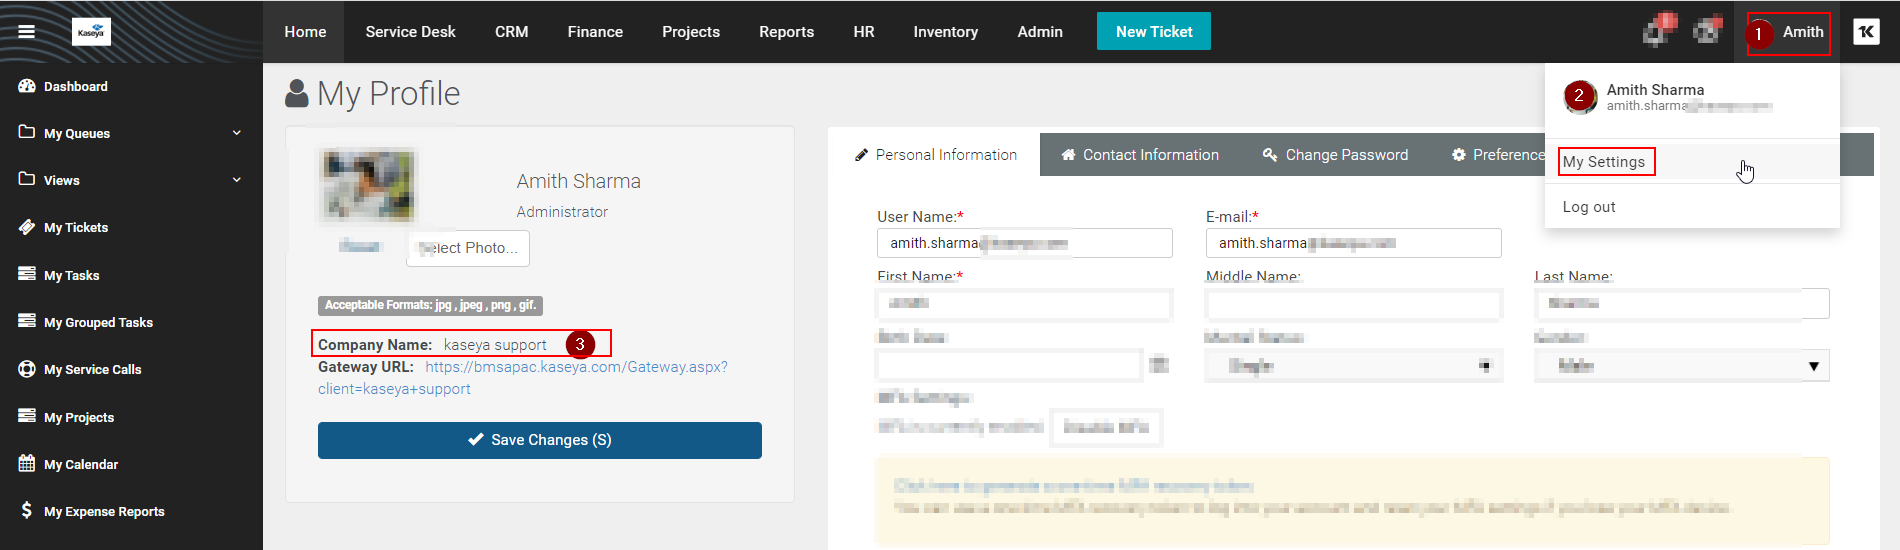
- Enter your tenant name. (To find out the tenant name, go to BMS > My Profile > My Settings > Company Name. The company name is the tenant name. It is case sensitive.)
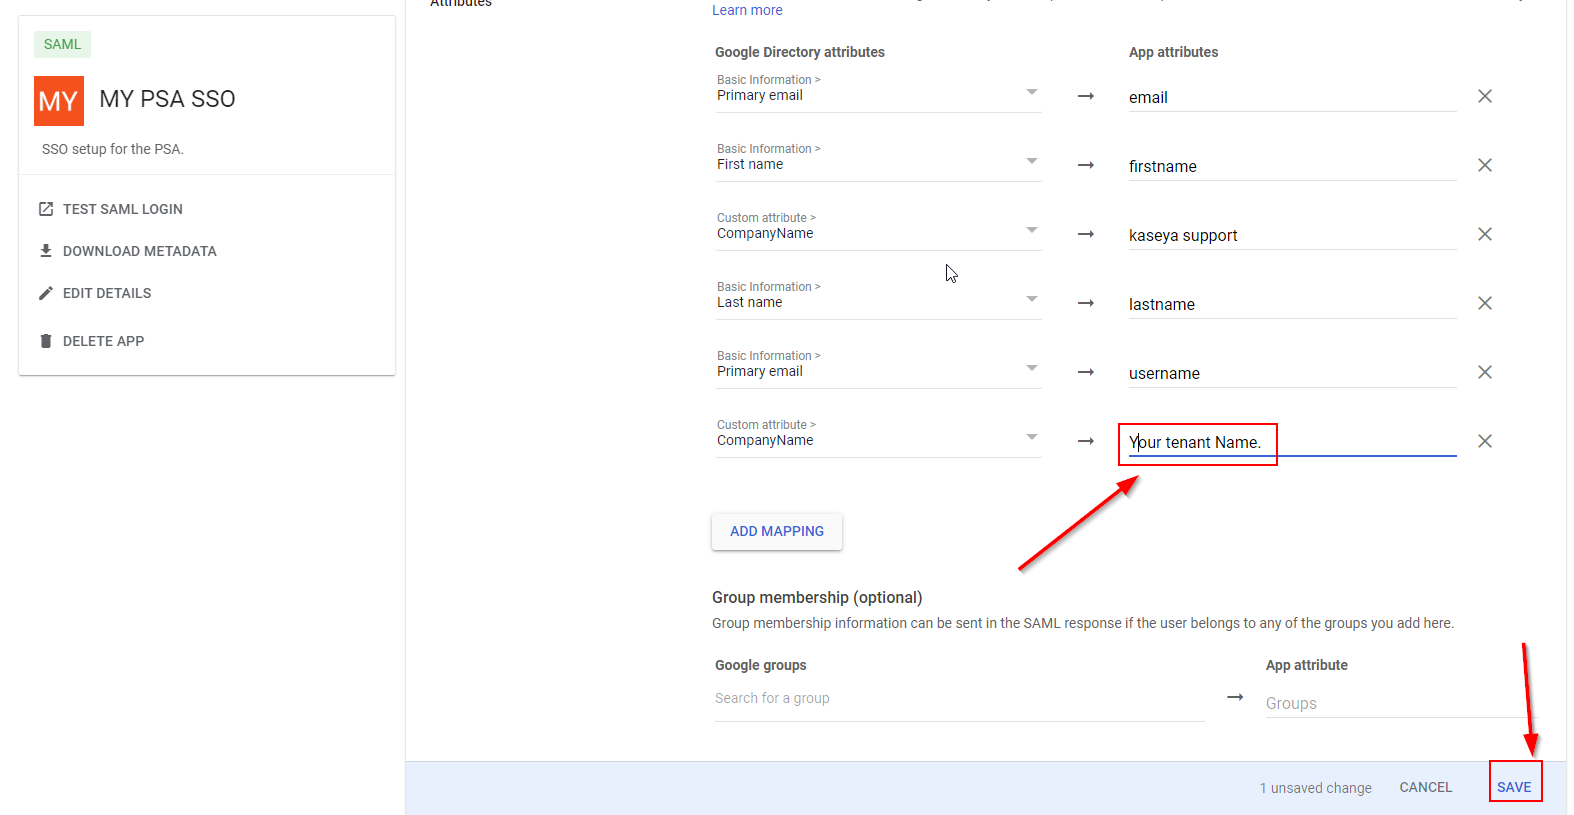
- Click Save.
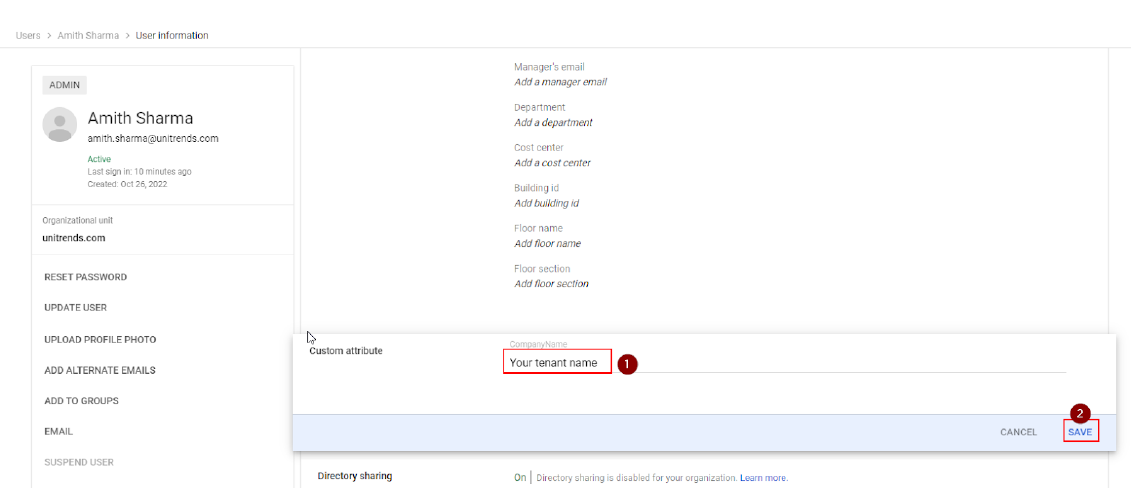
User for whom the SSO needs to be enabled
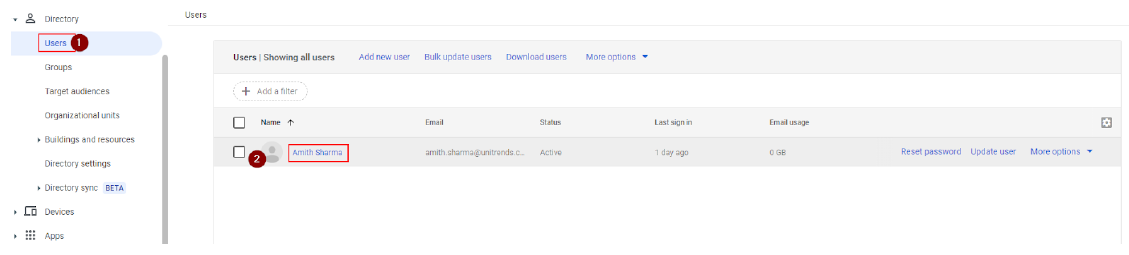
- Navigate to Users. Click the name of the particular user.
- Expand User information.

- Click Edit and add your tenant name.
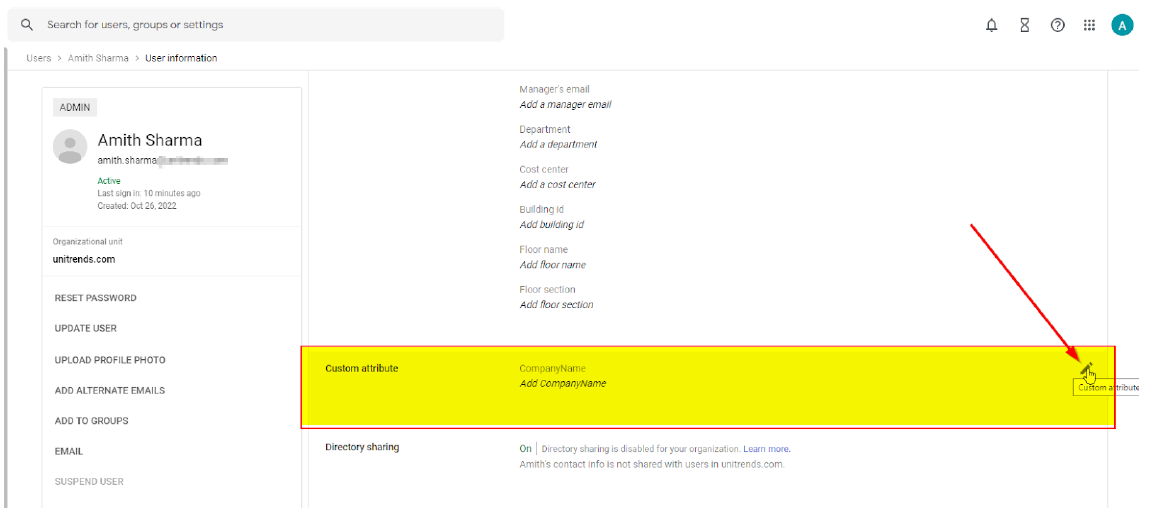
- Enter your tenant name. (To find out the tenant name, go to BMS > My Profile > My Settings > Company Name. The company name is the tenant name. It is case sensitive.)
User access for the app created
- Click User access.
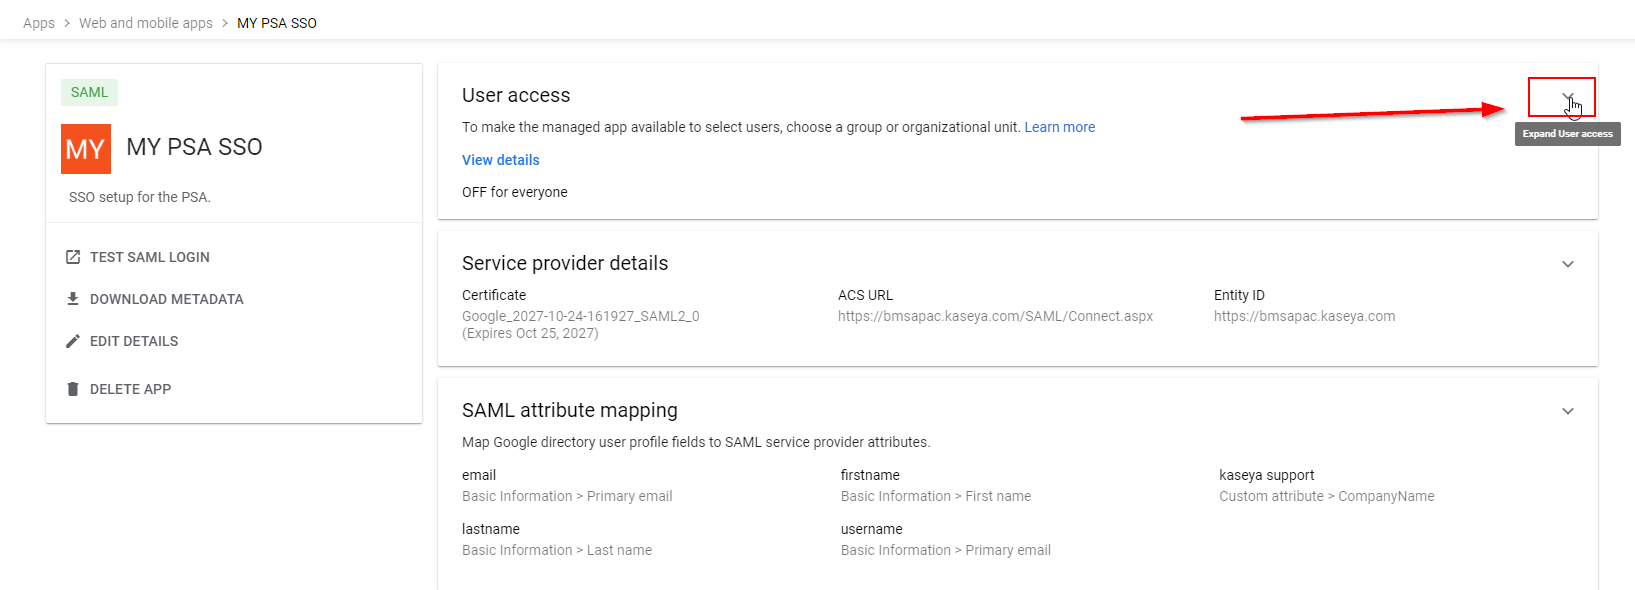
- Select the users.
- Click Save.
Custom SAML login endpoint URL
-
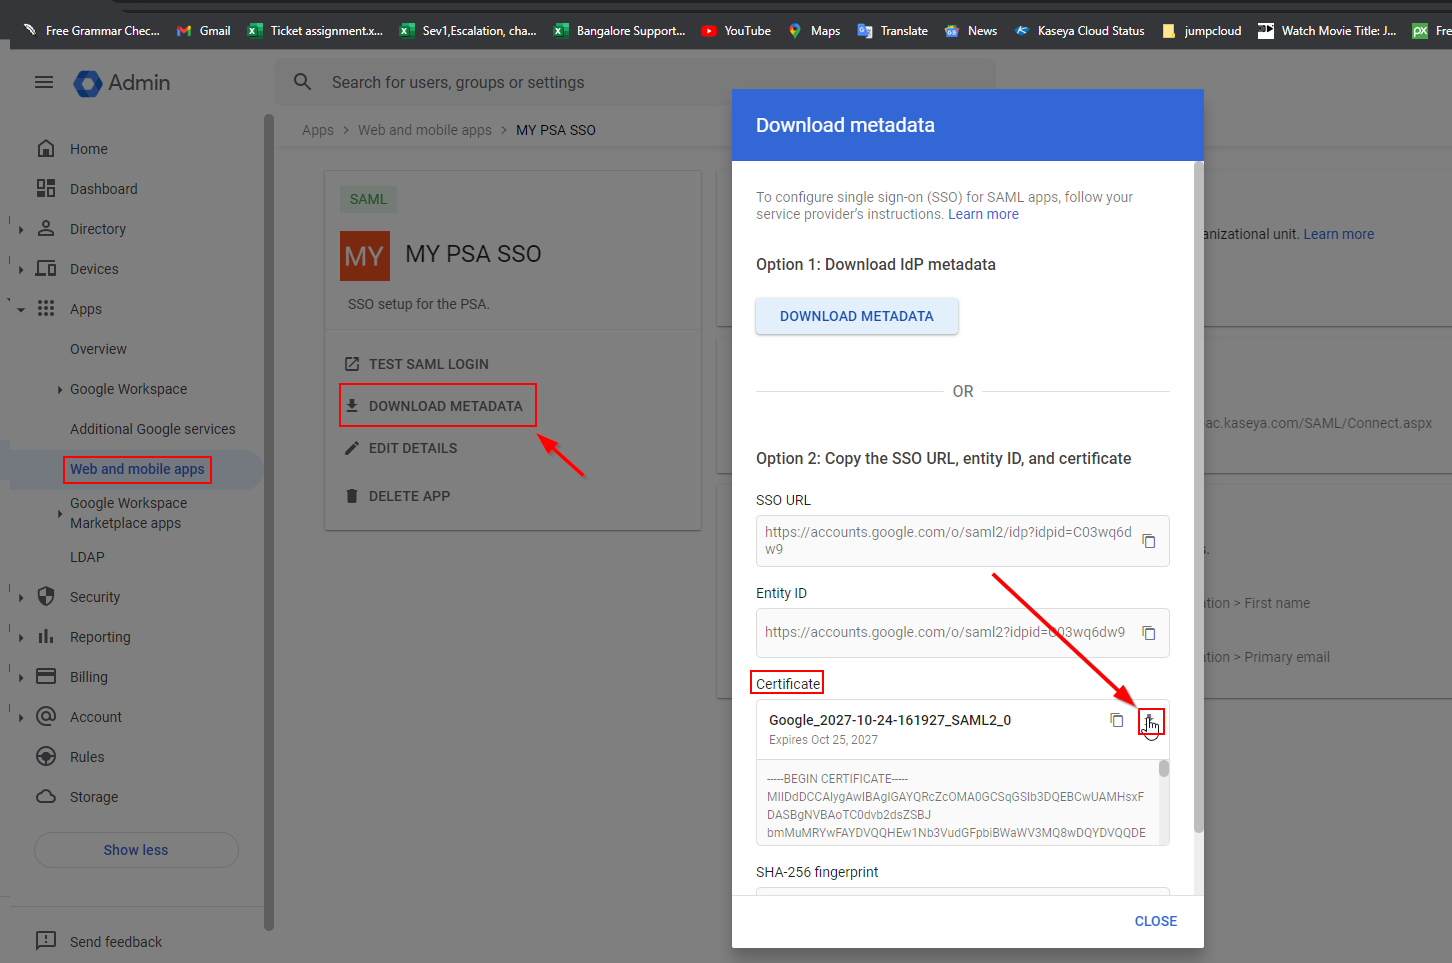
Copy the SSO URL and paste it in BMS. Username and SPID are not needed now.
- Navigate to Apps > Web and mobile apps > Download Metadata.
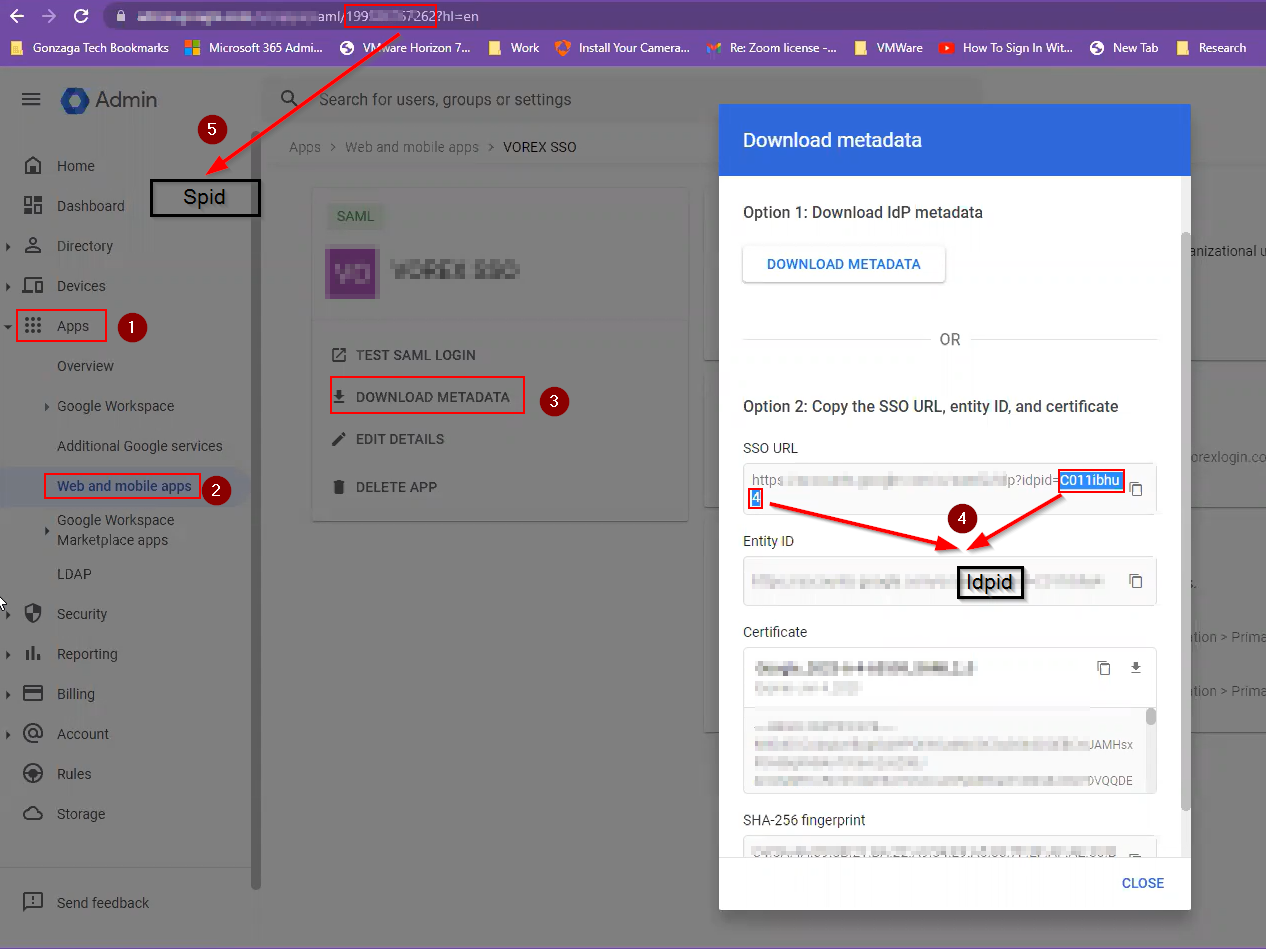
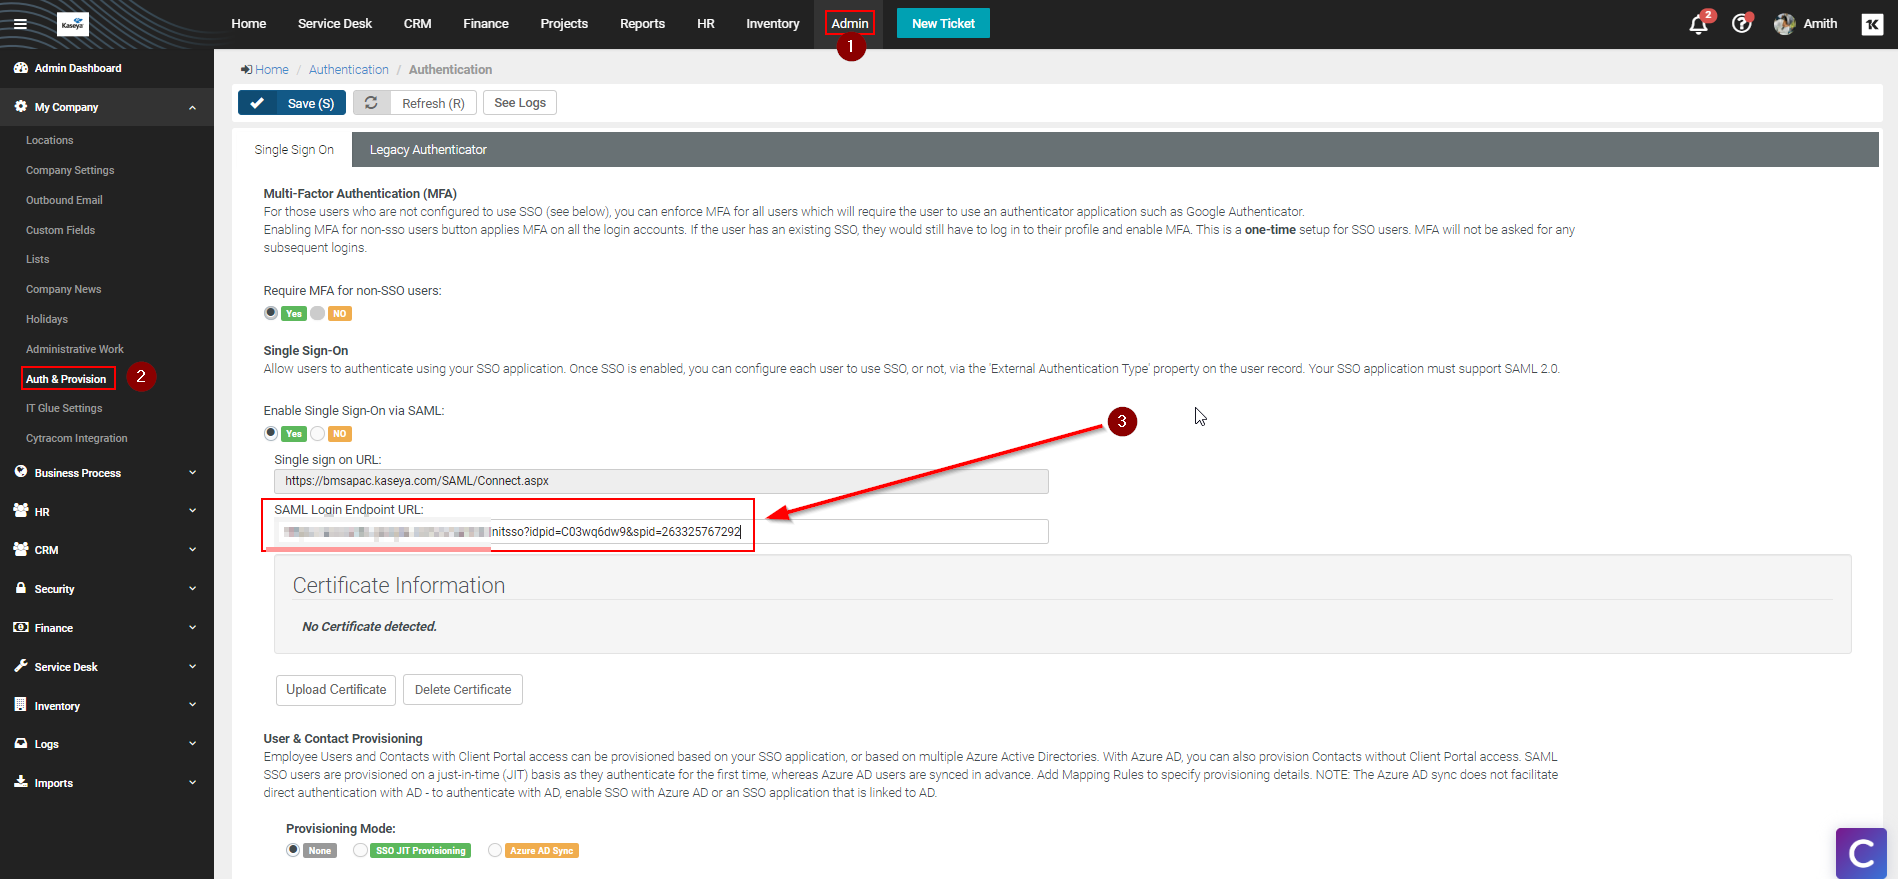
- Navigate to Admin > My Company > Auth & Provision and paste the SAML Login Endpoint URL.
Downloading the certificate
- Download the certificate.
-
IMPORTANT Once the file is downloaded, go to the Downloads folder, right-click and rename the file with .cer file extension in case it shows some other file extension.
- After the extension is changed, add the file to BMS.
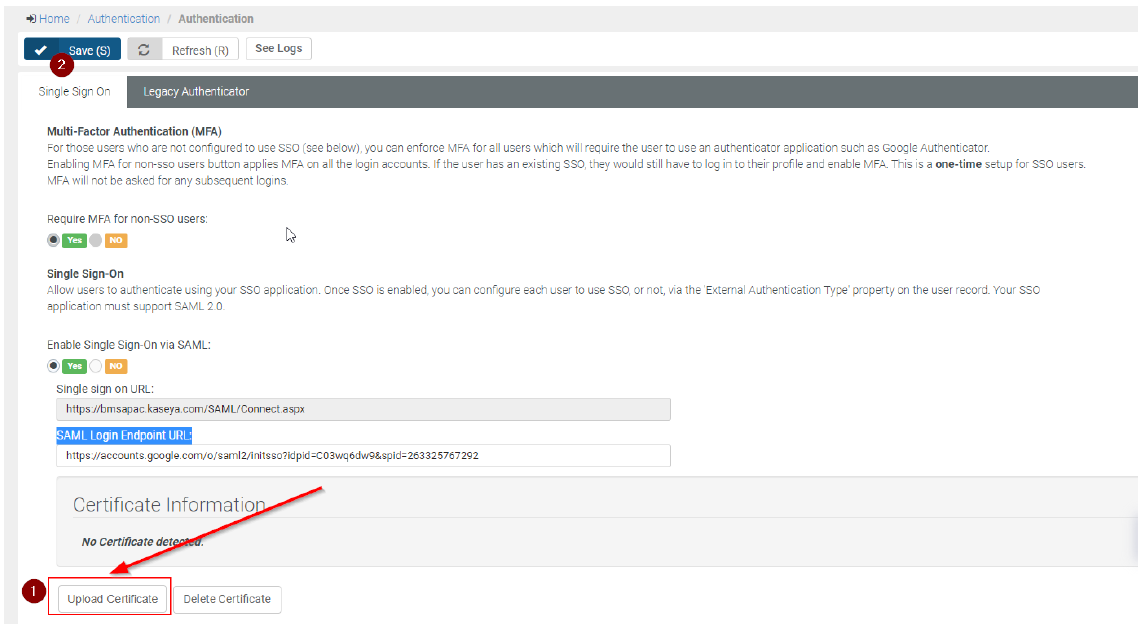
- Select the file, click Upload Certificate, and then click Save.
BMS setup
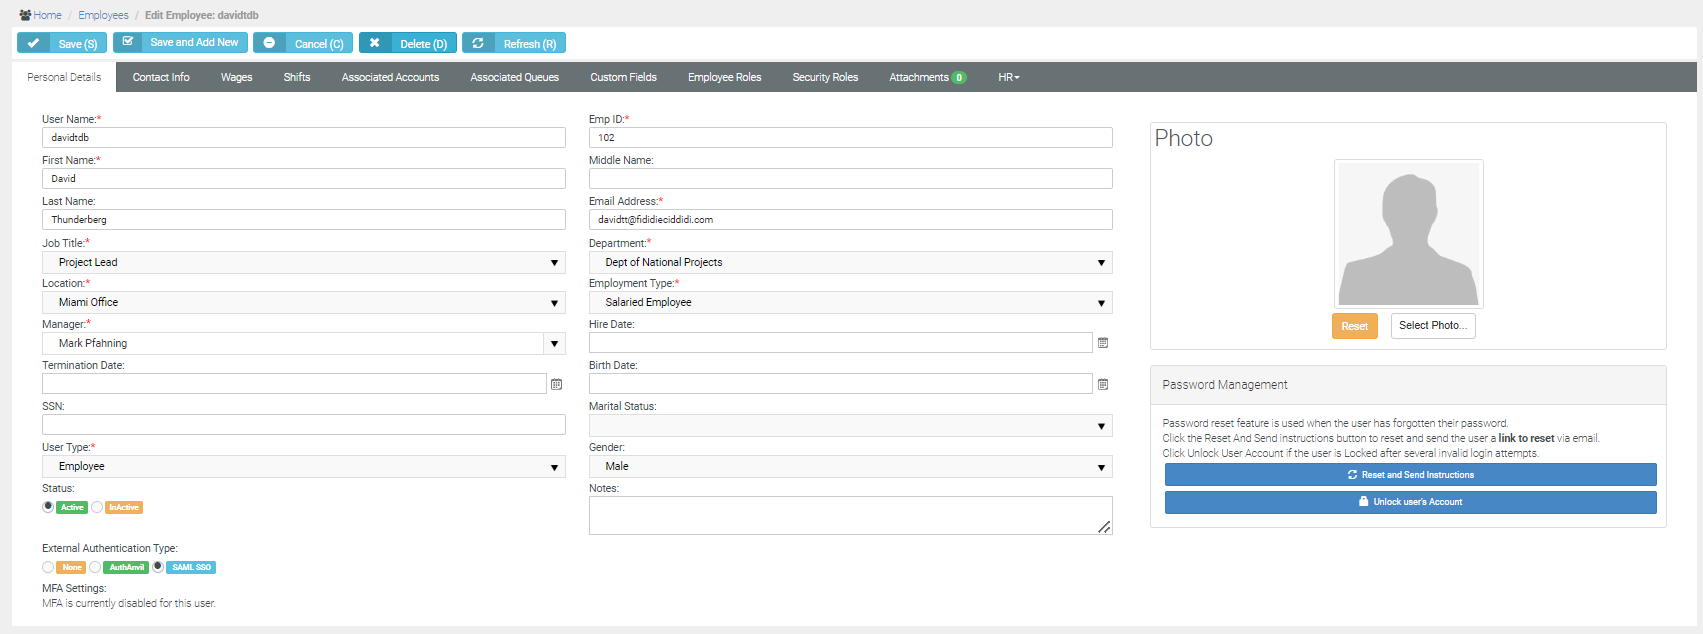
- Navigate to HR > Employees. Open the particular user's profile and enable SSO for the user.
- Once the SSO has been enabled for the user, the user will be able to log into the BMS instance now with the gateway URL. The user can also click on it.


